_edited.jpg)
Easter Egg-citement: DIY Baby Chick Hatching Topper Design
- Dulce Deco
- Mar 18, 2024
- 6 min read
Welcome to the world of DIY Easter cupcake toppers! Get ready to unleash your creativity and turn your sweet treats into artistic delights. The chick-hatching topper, symbolizing new beginnings and the joys of spring, is a standout design in this charming collection.
This DIY project invites you on an Easter crafting adventure, where each adorable chick brings the season's magic to your cupcakes. Perfect for festive gatherings, surprising loved ones, or simply embracing the spirit of Easter, these toppers add whimsy and delight to your treats. So, grab your crafting supplies, and let's create some Easter magic together!
Here is what you will need to get started...
Supplies
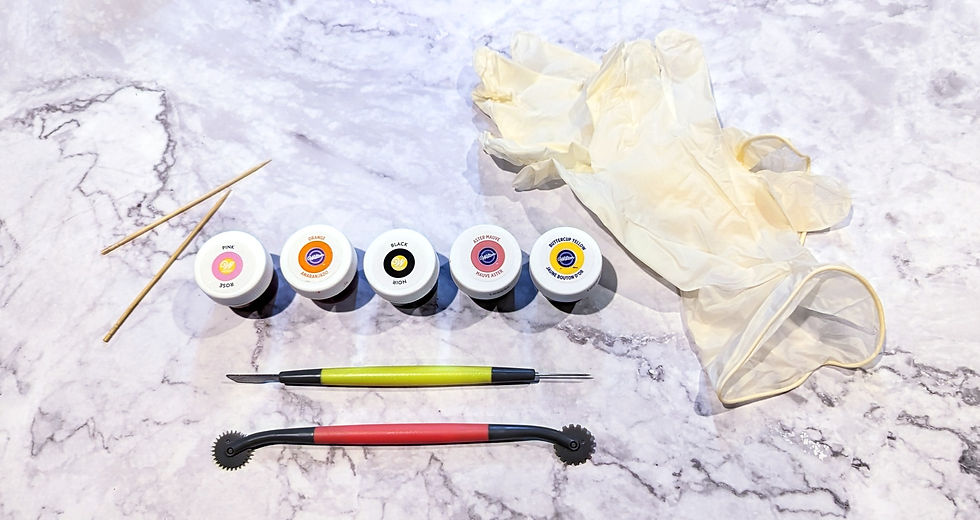
Fondant (white)
Food Colouring (yellow, pink, orange, black)
Toothpicks
Gloves
Round Cookie Cutters
Wax Paper
Fondant Roller
Prepare Your Workspace
Ensure your work surface is clean and dry
Dust your surface lightly with cornstarch or powdered sugar to prevent the fondant from sticking or you can use a sheet of wax paper as your working surface.
Colour Your Fondant
Fondant can be bought in the colour you need (green, yellow, white and white) but on the off chance your local supply store's inventory only carries white fondant, you can colour it at home by doing the following:
Cut out the amount of fondant you need to colour.
Select the food colouring colour you want.
Spread your fondant out to create a small pocket in the center.
Add 1-2 drops of food colouring.
Slowly fold the fondant edges inward to seal the food colouring inside. Next, knead and stretch the fondant until the colour has been evenly combined.
Continue this process until your desired colour has been achieved.
Repeat this process for each colour you need to make.
Remember to wear food-safe gloves if you're handling darker colours to prevent staining your hands.
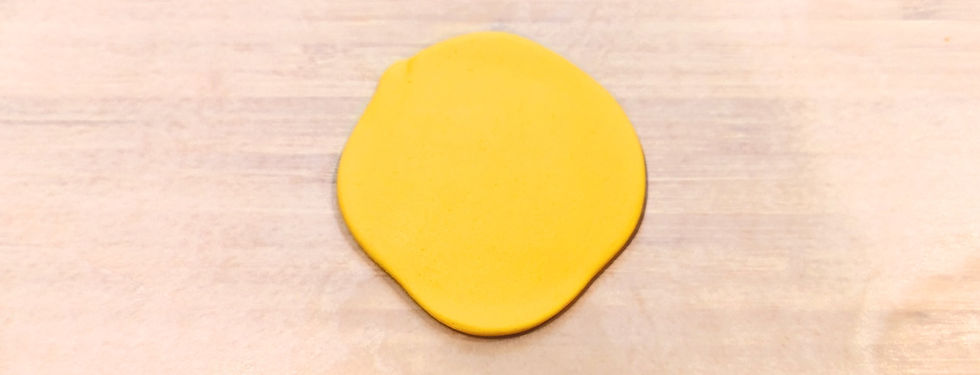
Prepare Fondant for Shaping
Step 1: The Eggshell
Starting with your white fondant, on a wax sheet of paper, roll out your white fondant to an even thickness, about 1/8 to 1/4 inch thick, using a rolling pin. Make sure it's large enough to cut out your desired shape.

Using a fondant knife or toothpick, trace the shape of a whole egg. Make sure your fondant is pliable, it will make it easier to create your outlined shape. If you don't get the desired shape on the first try, roll out your fondant and try again.
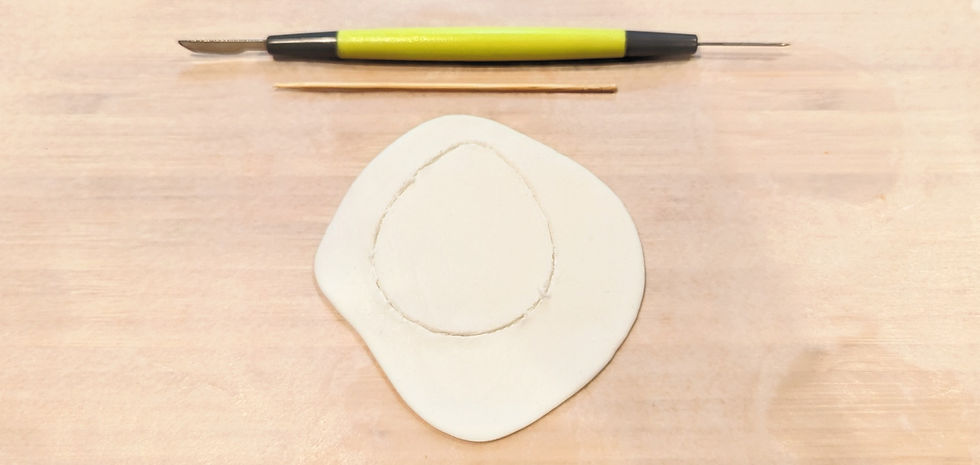
Pro Tip: To help you get the perfect egg shape, have a photo reference and trace the egg outline onto a wax sheet of paper. Using scissors, cut out the traced outline and place it onto your rolled fondant, trace and cut out a clean shape.
When you have finished cutting out your shape, place the extra pieces of fondant to the side but keep your tracing and cutting tools close by for step two.
To smooth the edges of your egg out, gently run along the rim using your ring finger, smoothing out the rough edges by using the slightest amount of pressure as possible.
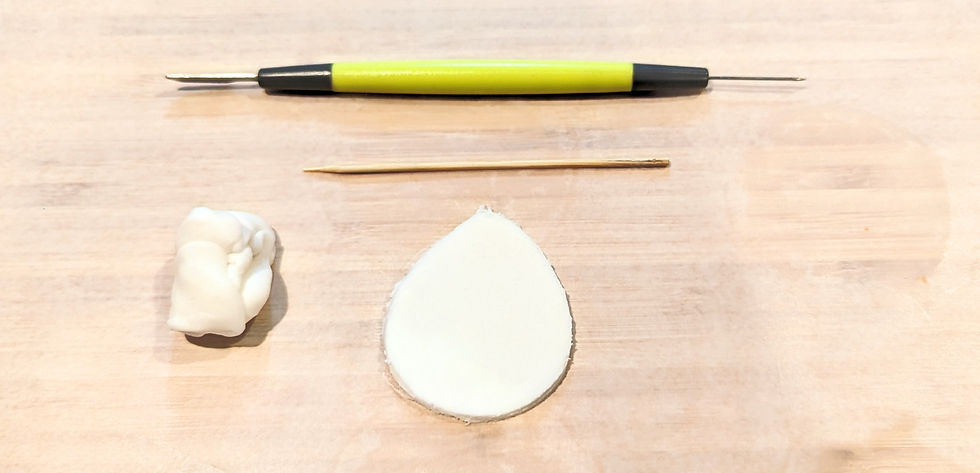
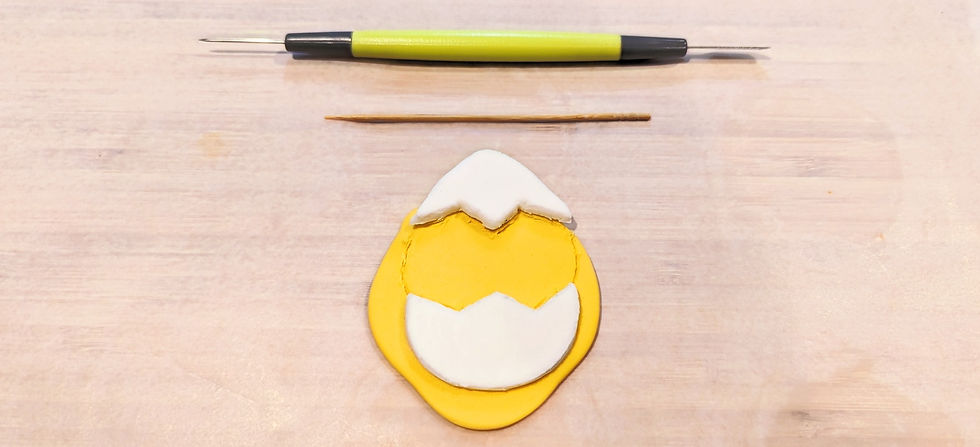
Step 2: Splitting your Eggshell
Using your tracing tool, outline a zig-zag shape 1/3 way down from the top of your egg shape. It should mimic the look of a cracked egg.
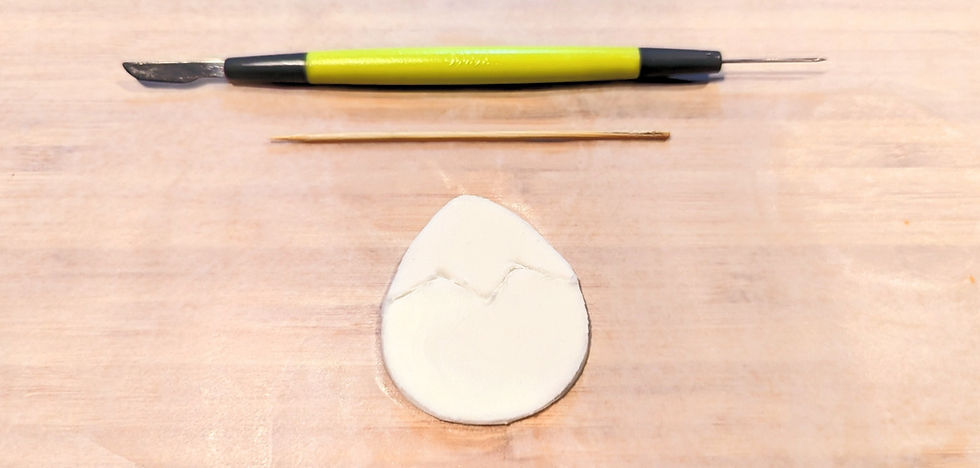
When you have created your desired zig-zag shape, cut through your zig-zag to split the top half of the egg from the bottom.
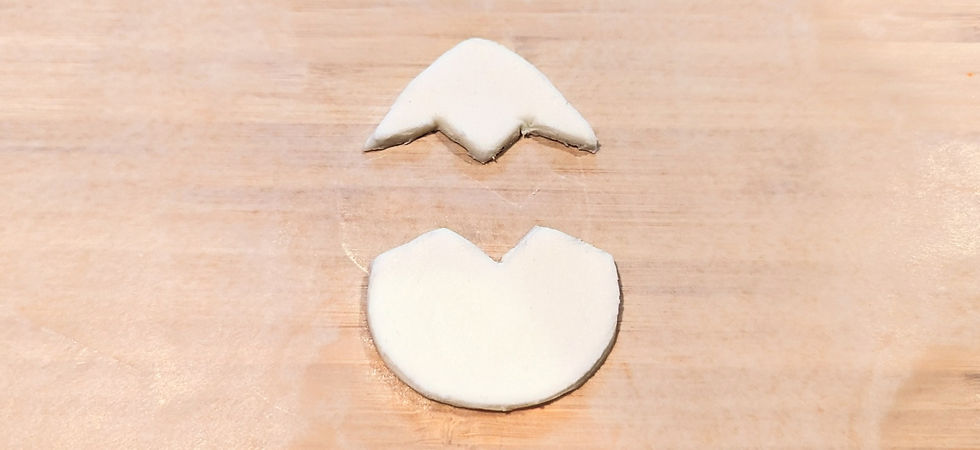
Setting the top half of the eggshell aside repeat the previous step for the bottom half of the eggshell. Trace an outline of another zig-zag shape just below the cut-line you previously made.
When you're happy with your zig-zag outline, cut along that line to remove the excess fondant.
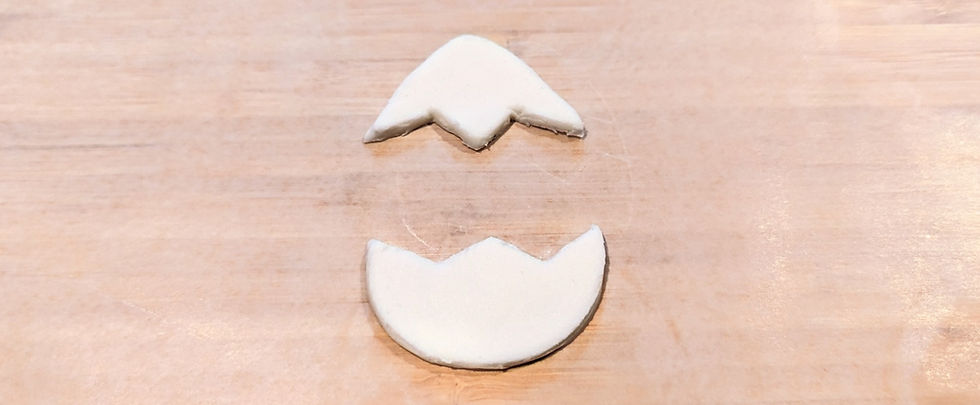
You are now left with two eggshell shapes! With your ring finger gently run along the rim, smoothing out the rough edges and applying the slightest amount of pressure as possible.
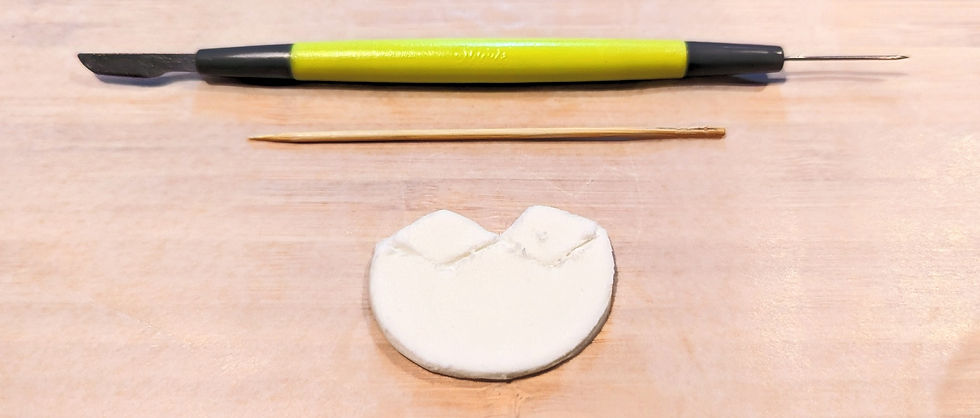
Step 3: Baby chick face
This step will create the baby chick hatching out of your two eggshell pieces. Using the excess fondant collected from step 2, dye your fondant yellow using the colouring pigments you have available.
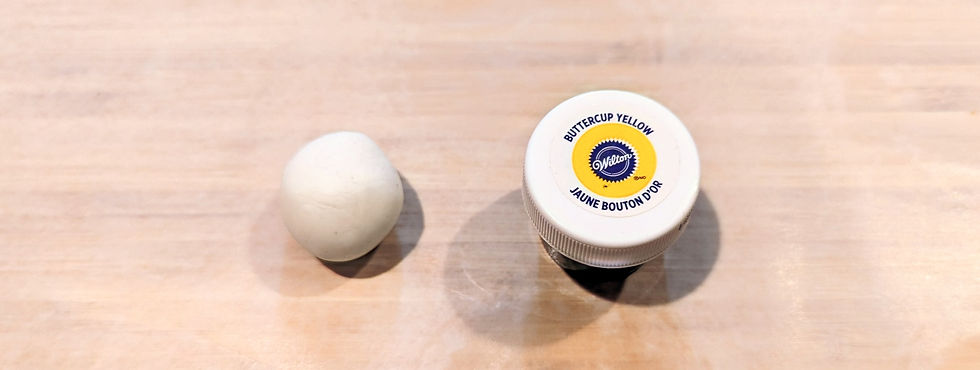
The fondant for this guide was coloured using the following dyes:
Wilson's Buttercup Yellow
Wilson's Deep Yellow
When your coloured fondant is ready, roll out the fondant to an even thickness, about 1/8 to 1/4 inch thick, using a rolling pin. Make sure the fondant thickness matches the eggshell and that it's large enough to cut out your desired shape.
Using your two eggshell pieces as a guide, set them 1-2 inches apart, creating a space between them for the baby chick to sit in. Trace 2 curved lines on either side of the egg, and trace alongside the eggshell edges.
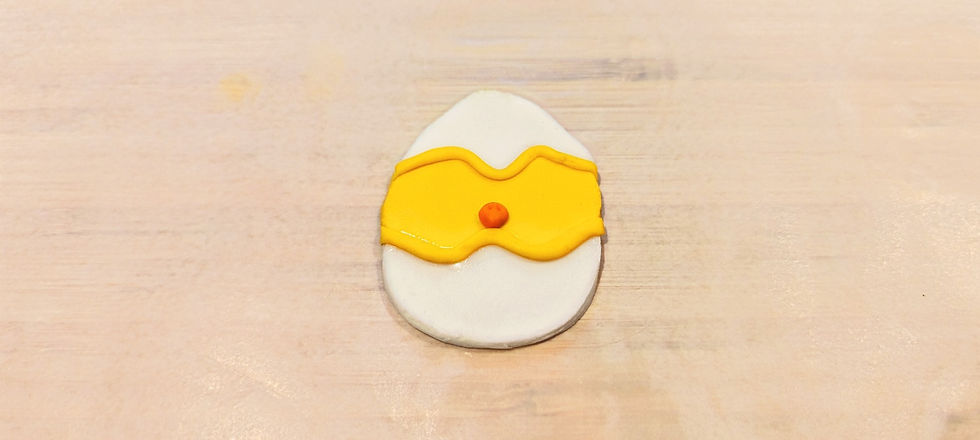
When you're happy with your traced outline, cut along that line to remove the excess fondant. Combine both your eggshell pieces and your baby chick's body together. To help them stick, gently press them together with a little bit of cold water along the edges.
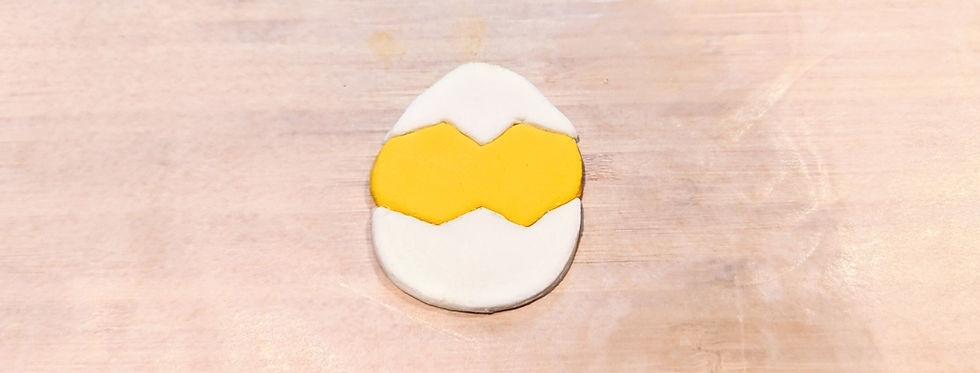
To help clean up the seams, roll two thin pieces of fondant using your hand and a flat surface.

While these thin pieces are still pliable, using a little bit of water place them on the connecting edges where the yellow and white fondant meet. Gently apply pressure as you shape the fondant to follow the zig-zag cuts.
When you're happy with its placement, leave it to dry for a few minutes before proceeding to the next step.
Step 4: The Beak
With the base of your shape complete, it's time to move on to the face of your baby chick. Starting with the shape of its beak.
Start by preparing your fondant, if you don't have a premade orange fondant available use your excess coloured fondant and colour it orange with the food dye you have.
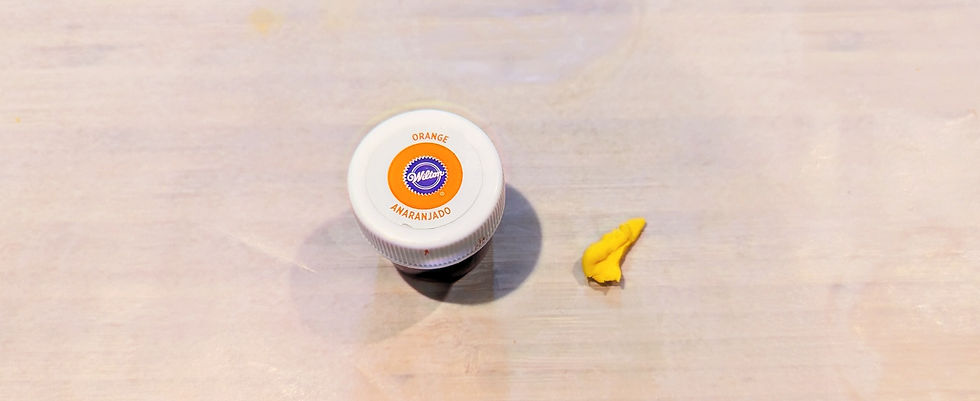
Shape your coloured fondant into a triangle, and keep the triangle corners soft and rounded. Make sure the shape of the beak isn't too flat you want the shape to be a little thick to create that 3-dimensional look. Have the tip of the beak slightly thicker, so it will protrude outward when you place the beak onto the baby chick's face.
You can add a little more detail to the beak, like creating its nostrils using the tip of a toothpick. Using a little pressure dig the tip of your toothpick into the beak. Make sure the tip of your toothpick is facing downward, in the direction of the beak's tip. And voila!
Your baby chick is slowly coming to life!
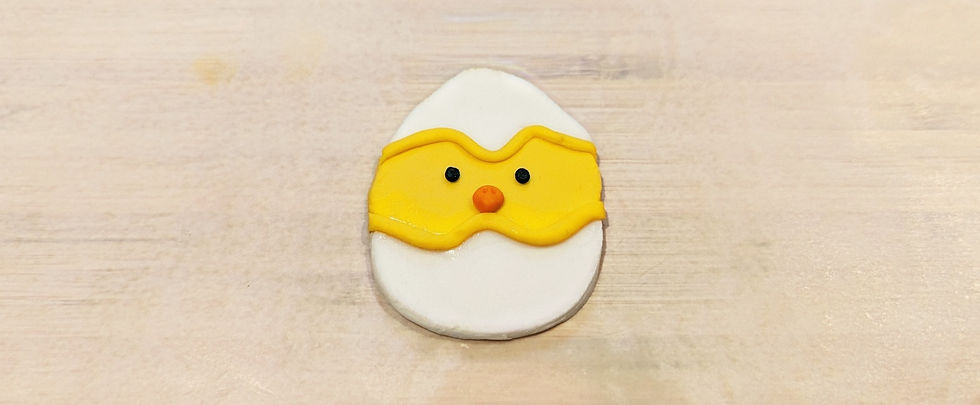
Step 5: The Eyes
Give your baby chick a pair of eyes! Using excess fondant from previous steps, colour your fondant black. You don't need a lot of fondant for this step. It will vary for everyone, depending on the size of the eyes you wish to make.
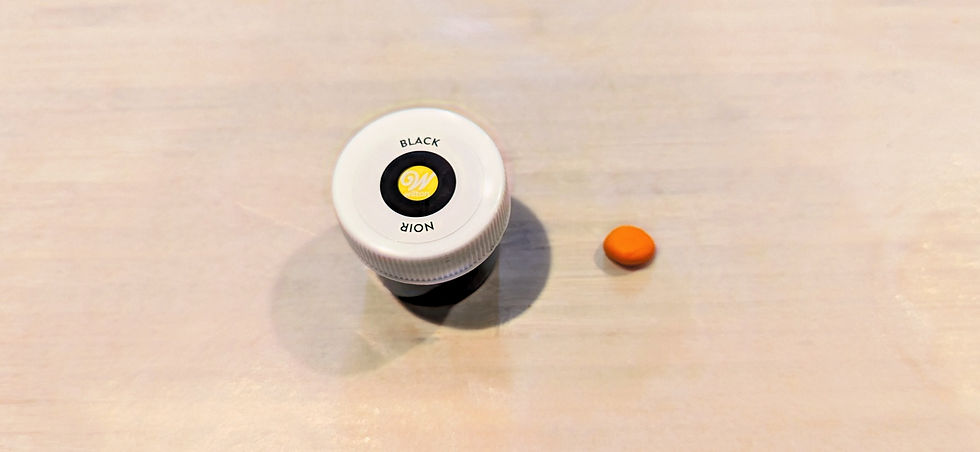
When your black fondant is ready, simply split the fondant into 2 even-sized balls and shape them in the eye shape you want your baby chick to have.
To help you place these small bits of fondant onto your base with minimal smearing, use the tip of a toothpick to gently place each eye into place.
Step 6: Rosy Cheeks
The final step to complete your masterpiece is to give your baby chick some rosy cheeks to bring your character to life.
Prepare your fondant, if you don't have a premade pink fondant available, use white fondant, and colour it with the food dye you have. White fondant will be better suited to help achieve that light pink colour.
Like the previous step with the eyes, you don't need a lot of fondant for this step, and you will be repeating the same process demonstrated in step 5. You can also use the same tip with the toothpick to help you set your fondant into place.
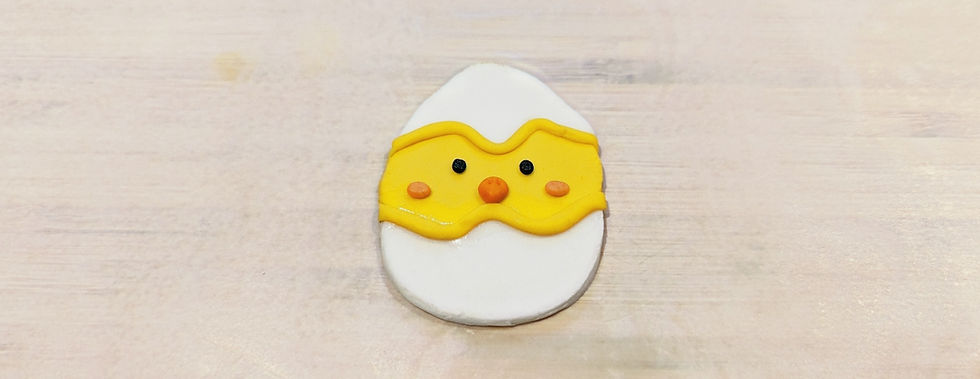
There you have it! A baby chick hatching out of an eggshell topper. Repeat the steps to make the amount of toppers you need.
These charming toppers symbolize the spirit of new beginnings and the beauty of spring, making them the perfect addition to your Easter festivities. Whether you're celebrating with family, friends, neighbours, or with your furry friends, may the joy of Easter fill your heart and home with sweetness and delight. Happy crafting, and happy Easter!
We Want to Hear from You!
If you liked this article and want to see more posts like this leave us a comment and let us know what you want to learn more of! If you really liked this article, spread the word and share with your family and friends, we'd love to hear from them too!
If you want to stay up to date on the latest posts, sales, and more join the Dulce Deco community.
Comments